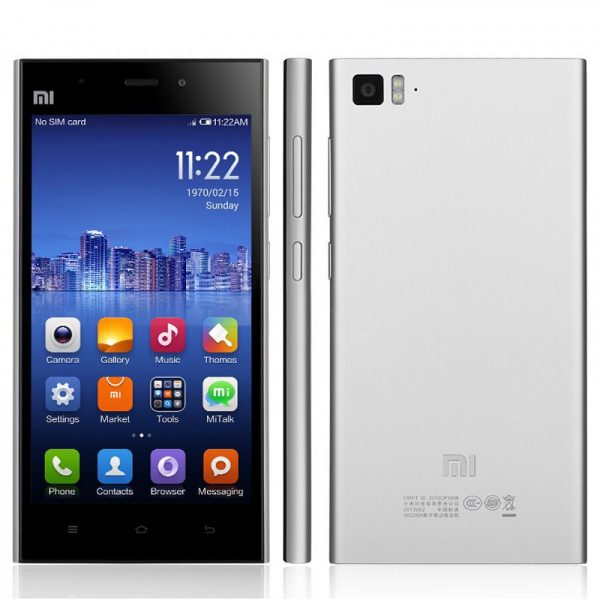
Turn off the device. Press the Volume� key and the Power button at the same time to enter Fastboot mode. Then connect the device to the Windows PC/laptop via a micro USB cable
Double click on the downloaded ROM file to decompress it. Open the file folder for the decompressed ROM pack, and copy its path on the computer.
Decompress the MIUI ROM flashing tool downloaded, and double click on it to install (if there is security warning, select �Run�). After installation is completed, open MiFlash.exe and paste into the address bar the ROM file folder path copied in the last step.
Click on the first button (circled out in yellow) to Refresh, and MiFlash should automatically recognize the device. Then click the second button (circled out in red) to flash the ROM file to the device
After flashing process, starts, it might take up to 5-10 minutes. So, keep patience and wait
Like this post? Hit the share buttons below to share this article with your friends on Facebook, Google+ and Twitter.
Solusi Flash VivoE5 MenggunakanVia SPFT ,terbaru dan terlengkap karena mengalami kendala seperti hang logo, kesalahan rooting, aplikasi berat, lupa pola kunci atau atau lupa password bahkan hingga hard brick. bisa di lakukan update firmware selama handphone masih bisa terdeteksi oleh computer. terkadang masalah seperti ini juga bisa di selesaikan dengan melakukan recovery mode untuk mereset handphone. namun semua itu bisa di atasi dengan install ulang program
Solusi Flash VivoE5 MenggunakanVia SPFT
Berikut yang harus di siapkan sebelum Flashing VivoE5
Flashtool versi 5
MTK DROID TOOL
MT65XX USB DRIVER
MTK6577 USB VCOM DRIVER
STOCK ROM Vivo E5
ALL STOCK ROM FIRMWARE Vivo
TUTORIAL :
Solusi Flash VivoE5 MenggunakanVia SPFT
INSTALL DRIVER
EXTRAK STOCK FIRMWARE Vivo E5
JALANKAN FLASHTOOL EXE
PADA SCATTER LOADING FILE,ARAHKAN KE FILE SCATTER YANG TERDAPAT DI STOCK ROM YANG TADI DI PILIH DOWNLOAD DAN SUDAH DI EXTRAK PAKAI WINRAR TADI
PRELOADER JANGAN DI CENTANG
KLIK DOWNLOAD PADA SP FLASHTOOL
MATIKAN HP Vivo,LALU HUBUNGKAN KE KOMPUTER DENGAN MEMAKAI KABEL USB
TUNGGU PROSES LOADING JALAN DI FLASHTOOL HINGGA ADA LINGKARAN HIJAU TANDA SELESAI.
CATATAN!!!!!!!
Jika mengalami kegagalan flashing pastikan anda mendownload file stock rom serta versi flashtool yang benar, Anda dapat menggulang dari awal jika terjadi kegagalan proses flashing update pada VIVO. pastikan tidak ada gangguan selama proses flashing seperti kabel tersenggol ada kendala yang membuat flashing terputus di tengah jalan.
BERIKUT INI CARA LENGKAP: CARA FLASHING STOCK FIRMWARE VIA SP FLASHTOOL
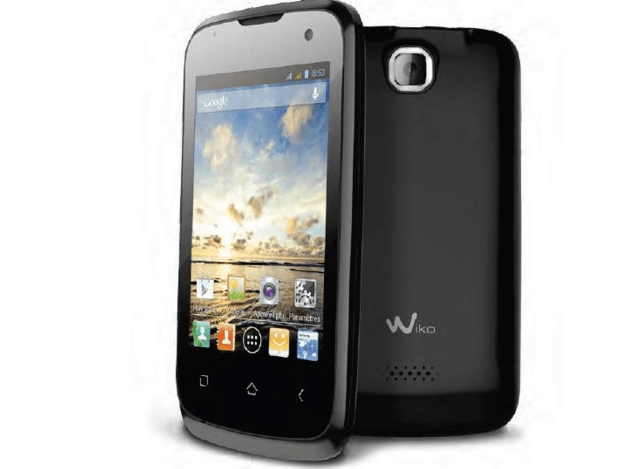
WIKO CINK PLUS MT6577 STOCK FIRMWARE JELLYBEAN 4.1.1 FLASH FILE
Wiko Cink Plus MT6577 Stock Firmware Jellybean 4.1.1 Flash File
First step to Install Firmware
Download and install MTK android USB drivers
Download And Install SP Flash Tool
How To Flash Wiko Cink Plus
First, you need to download and install sp flash tool
Download and install MTK android USB drivers
Then download Firmware file/Flash file/Rom for your phone
Your phone must have 50 % charging before this process
switch off yourmobile remove the battery (if removable) reinsert the battery and plug the USB cable in charging socket
Now open SPflash tool.exe
When sp flash tool open, go to download button in sp flash tool
In download tab, click on scatter load button
After locating the scatter tab, click on the download button
Now connect your smart phone with a USB cable and press volume up or volume down key for easy detection (remove and re insert your phone battery if it is removable)
Now flashing is completed, a green ring will appear in sp flash tool
Close sp flash tool on your computer and unplug phone
Power on the phone and enjoy
After flashing process starts and might take up to 5-10 minutes. So keep patience and wait.
See detailed Instruction MT flashing sp tool with images
Vodafone S9300A Mt6589 Stock Rom Firmware Flash Free
VODAFONE S9300A MT6589 STOCK ROM FIRMWARE FLASH FILE
Vodafone S9300A Mt6589 Stock Rom Firmware Flash File
First step to Install Firmware
Download and install MTK android USB drivers
Download And Install SP Flash Tool
How To Flash Vodafone S9300A
First, you need to download and install SP flash tool
Download and install MTK android USB drivers
Then download Firmware file/Flash file/Rom for your phone
Your phone must have 50 % charging before this process,
switch off your mobile remove the battery (if removable) reinsert the battery and plug the USB cable in charging socket
Now open SP flash tool.exe
When SP flash tool open, go to download button in SP flash tool
In download tab, click on scatter load button
After locating the scatter tab, click on the download button
Now connect your smart phone with a USB cable and press volume up or volume down key for easy detection (remove and re insert your phone battery if it is removable)
Now flashing is completed, a green ring will appear in SP flash tool
Close SP flash tool on your computer and unplug phone
Power on the phone and enjoy
After flashing process, starts, it might take up to 5-10 minutes. So, keep patience and wait
See detailed Instruction MT flashing SP tool with images
First, you need to download and install sp flash tool
Download and install MTK Android USB drivers
Then download Firmware file/Flash file/ROM for your phone
Your phone must have 50 % charging before this process
switch off your mobile remove the battery (if removable) reinsert the battery and plug the USB cable in charging socket
Now open SPflash tool.exe
When sp flash tool open, go to download button in sp flash tool
In download tab, click on scatter load button
After locating the scatter tab, click on the download button
Now connect your smartphone with a USB cable and press volume up or volume down key for easy detection (remove and re-insert your phone battery if it is removable)
Now flashing is completed, a green ring will appear in sp flash tool
Close sp flash tool on your computer and unplug phone
Power on the phone and enjoy
After flashing process starts, it might take up to 5-10 minutes. So keep patience and wait.
See detailed Instruction MT flashing sp tool with images
Androzero | How to flash Huawei Honor 6 via sdcard. Hello androzero-friend, how are you? on the occasion of this androzero will share how to flash Huawei Honor 6 via sdcard, do not bother to mention mate, smartphone flash wear pc. whether the smartphone is experiencing bootloop buddy? Bootloop is a condition where the smartphone can not get into the android system (if we turn on only until the beginning logo only). This happens because bootloop (flashing failed, failed a custom rom, os which have been modified).
Androzero trying to help bootlop problems on smartphone Huawei mate, through how to Flash Huawei Honor 6 via sdcard, please follow coherently and correctly about how to Flash Huawei Honor 6 via sdcard, we provide always updated firmware. Have a friend see how to flash Huawei Honor 6 via sdcard follows.
Huawei Honor 6 flash tools:
Firmware Huawei Honor 6, here
How to Flash Huawei Honor 6:
Please download the materials on top,
then follow the steps extract file.zip
please copy UPDATE.APP in SD Card (not in place in the folder)
then Turn off the smartphone Huawei Honor 6
Go into Recovery Mode by: press and hold ( "Volume Up + Volume Down + Power") a few seconds. up Mode Increasing
Wait for the firmware update process Flashing smartphone Huawei Honor 6 to finish Reboot automatically.
finished
Hopefully tutorial how to Flash Huawei Honor 6 via sdcard helping with friends, see you in the next tutorial.
Must read: If want to repair device, can try to repair it by. have to charge a battery with any charger and charged it by 91%. Your data is very important for so it is good to do a backup of data it may consist of contact details, important messages, emails or any other important thing which feel to be the backup in a device. This backup can be done on another device. we have to do the backup because after a format of a device, all data will be gone and it will not be recovered. For backup in other devices, you can use another external device like hard drive, SD card or any other suitable devices. If are doing by own. do it at your own risk as we dont take any responsibility if a device is damaged If you have Vivo V3 device and in any type software problems so use this guide its simple to use without any risk cause this is tested by me read more know about software problems from the below description there given more of reason to not detect device with Computer or Laptop before use must read all carefully read if any type problems or comes error to displayed just leave your comment on below comment box I will soon fix it if possible lets know how to flash or fix software problems in Vivo V3 ?
Vivo V3 USB Driver or Flash Tool
Below type sort software problems in device then you can use this method: This flash file is tested by me and it is working very well without any error, can use this flash file when device can use this guide when device in hang on logo, restarting, auto turn on internet connection, auto turn on WiFi connection, auto app installing, auto gone balance, pattern lock, screen lock etc these type issues can use this way etc. This is used without any tool and box.and also free for all who has knowledge about software in mobiles.for flashing file it is most important to first check micro USB cable. if it is not good, can not flash it. and the another one is to check device battery. it should not be low, it can stop device between flash. before the flash, it is necessary to save data like contacts, photos, videos and other important things.
Below sort problems is hardware: This method can be used without any box its done from flash tool its also available here, and it is important to installing phones driver, you cant flash or upgrade if it is not installed on your computer or laptop it must be installed and also available in this post, here all are linked that tested and working fine just in one try you can easily solve any problem with this method if you are fresher technician or experienced technician in android software related if the error occurs of USB not recognized then your USB is not working.if a battery is not charged,your USB socket will not proper work and you will fail in this method. if any issues please write your questions in the comment box I will try my best to help you.
Required for Vivo V3
Vivo V3 device with well battery charged, do not try with low battery
Vivo V3 Stock ROM Firmware | Download
Vivo V3 QFIL Flash Tool | Download
Vivo V3 USB (Flashing) Driver | Download
Micro usb cable with Good Quality
Computer or Laptop
Procedure for Vivo V3
First download tested Firmware, Flash tool or driver from above link (if link not working just leave your comment on below comment box i will soon fix it)
Extract to all are zip files to desktop or as you like path (must be installed winrar software to Extract)
Open Driver folder and choose Qualcomm_USB_Driver_Setup.exe file and wait until finish installation
Open QPST.WIN.2.7_Installer-00430.1 folder and chose setup.exe file and open and install it
Now open QFIL from the "C:Program FilesQualcommQPST in" path
Go to SelectProgrammer optionand click on Browse.. button and Select prog_emmc_firehose_8936.mbn from SW Folder file
Click on Load XML.. button and choose rawprogram_unsparse.xml file and second choose patch0.xml file from the Vivo_V3_PD1524F_EX_A_1.10.11 folder
Press and hold Volume Up + Down and Insert USB cable and wait until driver install
After drier installed just Click on Download button and wait until finish process
First, you need to download and install sp flash tool
Download and install MTK android USB drivers
Then download Firmware file/Flash file/Rom for your phone
Your phone must have 50 % charging before this process
switch off yourmobile remove the battery (if removable) reinsert the battery and plug the USB cable in charging socket
Now open SPflash tool.exe
When sp flash tool open, go to download button in sp flash tool
In download tab, click on scatter load button
After locating the scatter tab, click on the download button
Now connect your smart phone with a USB cable and press volume up or volume down key for easy detection (remove and re insert your phone battery if it is removable)
Now flashing is completed, a green ring will appear in sp flash tool
Close sp flash tool on your computer and unplug phone
Power on the phone and enjoy
After flashing process starts and might take up to 5-10 minutes. So keep patience and wait.
See detailed Instruction MT flashing sp tool with images
androzero.blogspot.com | Cara Flash Coolpad 7270 via Flashtool. Halo sobat androzero, Apa kabar? kali ini androzero akan membagikan tutorial cara flash coolpad 7270 via flashtool. Apakah smartphone Coolpad kesayangan sobat mengalami bootlop? Bootlop merupakan kondisi dimana smartphone tidak bisa masuk ke sistem android (apabila kita nyalakan cuma sampai pada logo saja). Bootlop ini diakibakan oleh (gagal flash, gagal custom rom, sistem yang dimodifikasi).
Sobat tidak perlu panik dalam menghadapi permaslahan ini, androzero akan membantu sobat lewat tutorial cara flash coolpad 7270 via flashtool. Sobat tinggal menyimak dan mengikuti secara runtut tutorial cara flash coolpad note 3 lite via flashtool. Silahkan sobat mulai menyimak tutorial cara flash coolpad note 3 lite via flashtool berikut.
Bahan Flash Coolpad 7270 :
Flashtool, Disini
Firmware Coolpad 7270, Disini
MTK Droid, Disini
MT65xx USB Vcom Driver, Disini
Cara Flash coolpad 7270 :
Ekstrak dan instal file driver yang sudah di download.
Ekstrak juga Firmware Coolpad 7270 dalam package winrar.
Kemudian jalankan Flashtool.exe
Pilih scatter loading file, arahkan lalu arahkan pada file �MT6735_Android_scatter.txt�.
Selanjutnya klik tap �Download� , jika mengalami kegagalan maka klik tap �Upgrade� .
Tahap berikutnya, matikan Coolpad 7270 selama 10 detik kemudian, hubungkan dengan pc melalui usb kabel data.
Terakhir, tunggu hingga proses flashing selesai, jika seluruh proses flashtool selesai maka akan notifikasi Checklist OK tanda flashing telah selesai.
Semoga tutorial cara flash coolpad 7270 via flashtool dapat membantu sobat. Sampai jumpa pada tutorial selanjutnya.
Vodafone Smart Grand VF696 Android 5 1 Firmware Flash Free
VODAFONE SMART GRAND VF696 ANDROID 5.1 FIRMWARE FLASH FILE
Vodafone Smart Grand VF696 Android 5.1 Firmware Flash File
First step to Install Firmware
Download and install MTK Android USB drivers
Download And Install SP Flash Tool
How To Flash Vodafone Smart Grand VF696
First, you need to download and install SP flash tool
Download and install MTK Android USB drivers
Then download Firmware file/Flash file/ROM for your phone
Your phone must have 50 % charging before this process,
switch off your mobile remove the battery (if removable) reinsert the battery and plug the USB cable in charging socket
Now open SP flash tool.exe
When SP flash tool open, go to download button in SP flash tool
In download tab, click on scatter load button
After locating the scatter tab, click on the download button
Now connect your smartphone with a USB cable and press volume up or volume down key for easy detection (remove and re-insert your phone battery if it is removable)
Now flashing is completed, a green ring will appear in SP flash tool
Close SP flash tool on your computer and unplug phone
Power on the phone and enjoy
After flashing process, starts, it might take up to 5-10 minutes. So, keep patience and wait.
See detailed Instruction MT flashing SP tool with images
First, you need to download and install SP flash tool
Download and install MTK Android USB drivers
Then download Firmware file/Flash file/ROM for your phone
Your phone must have 50 % charging before this process,
switch off your mobile remove the battery (if removable) reinsert the battery and plug the USB cable in charging socket
Now open SP flash tool.exe
When SP flash tool open, go to download button in SP flash tool
In download tab, click on scatter load button
After locating the scatter tab, click on the download button
Now connect your smartphone with a USB cable and press volume up or volume down key for easy detection (remove and re-insert your phone battery if it is removable)
Now flashing is completed, a green ring will appear in SP flash tool
Close SP flash tool on your computer and unplug phone
Power on the phone and enjoy
After flashing process, starts, it might take up to 5-10 minutes. So, keep patience and wait.
See detailed Instruction MT flashing SP tool with images
Cara Flash LG G5 SE H845 Via KDZ Flashtool Terlengkap karena Bootloop kerusakan software oleh sebabkan kesalahan proses rooting atau penginstallan aplikasi yang membawa wallware atau virus yang mengakibatkan kinerja handphone bermasalah, tapi selama masih terdeteksi computer atau driver anda masih bisa memperbaikinya dengan install ulang firmware. atau kalau masih memungkin anda juga bisa melakukan recovery mode atau melakukan reset user data. tapi terkadang kerusakan tidak bisa di selesaikan dengan cara itu anda juga memerlukan update untuk memperbaharui firmware anda.
Berikut perangkat yang harus di perlukan untuk flashing LG G5 SE H845
Stock Rom (file kdz)ResmiLG G5 SE H845
LG G5 SE H845 Via (KDZ)Flashtool
LG G5 SE H845United Mobile Driver
LG Driver Usb
TUTORIAL
Ambil Stock Rom (file kdz)LG
AmbilLG G5 SE H845Driver Usb
Ambil dan extrakLG G5 SE H845KDZ Flashtool
Ambil United Mobile Driver
RUN LG KDZ Flashtool Exe.
Pilih jenis CDMA Telepon mode DIAG di bagian kdz arahkan ke stock fimware yang di download matikan hp LG G5 SE H845 dan cabut bateri lalu pasang kembali masuk ke unduh modus volume tekan di fferences+power sambungkan kaber usb dari komputer biarkan hingga LG bertuliskan fimware update dan komputer mengenalin perangkat LG KLIK mulai untuk proses Flashing berjalan...
Proses Flasing LG G5 SE H845 bisa memakan waktu sekitar 20 menit,jika terdapat tulisan finis atau centang berwarna hijau dari LG Flasing tersebut berarti menendapakan hp anda siap dan normal kembali dan tidak lupa mencabut kabel usb dari komputer yang telah memflasing hp LG.matikan hp tersebut dan hidupkan kembali......
CATATAN!!!!!!!
Jika mengalami kegagalan flashing pastikan anda mendownload file stock rom serta versi flashtool yang benar, Anda dapat menggulang dari awal jika terjadi kegagalan proses flashing update pada LG. pastikan tidak ada gangguan selama proses flashing seperti kabel tersenggol ada kendala yang membuat flashing terputus di tengah jalan.
selamat mencoba
BERIKUT INI ADALAH CARA TERLENGKAP: ALL STOCK ROM LG VIA KDZ
Grand Theft Auto v - GTA 5 iso cso apk android for ppsspp free download working on mobile, also known as Grand Theft Auto 5 or GTA V is a game developed by Rockstar Games. No Password Needed.
The first version of the game was released on Xbox 360 and PlayStation 3 by the end of 2013. Later the game was released for PlayStation 4 and Xbox One in November 2014. Now, finally has been released version for psp . So now you can enjoy GTA 5 in the Palm of your hand. GTA 5 for psp has the same high quality graphics.
GTA 5 is a game that takes place in an open world where you can freely wander anywhere you want, even during the course of a mission.
The mobile version of GTA 5 for ppsspp is situated in the city of Los Santos, and can switch between three different characters. This was one of the most anticipated titles, then we leave an image of it that looks well GTA 5 in an mobile device, specifically the S5 Galaxy. GTA 5 game mode has been much improved with respect to the previous Grand Theft Auto games. In this game you can enjoy the gaming experience of the titles of racing and also in first and third person action titles. Now you can select a multitude of weapons, new features added are, the possibility of carrying out activities such as yoga, diving, hunting, tennis, etc. The world is now larger than in GTA San Andreas and GTA IV. GTA V for psp is the best game to enjoy a free moment. You can download the GTA 5 psp iso from here then. Grand Theft Auto V for Android systems. We achieved this few days ago and since then we were testing Gta 5 apk on a different smartphones. We have a lot of good news. First of all, even on the older versions of telephones GTA V was working without any lags or fps drops. Another important thing is compatibility. Gta 5 apk works not only on mobile phones. You can run it on the tablets, etc. Everything where you have one of the systems written above can launch without the slightest problems our product.
Install Instruction: 1. Download & Instal PPSSPP Gold On your Device 2. Then download psp iso cso 3. Run Emultor and select your ISO Rom 4. Play and enjoy the game.
Below is the direct link to download the Arise AR24 Stock Firmware (flash file) from GoogleDrive. Firmware contains Flash Tool, Driver and instructions. How to Flash Step 1: Download and extract the stock firmware on your computer. Step 2: After extracting you will find the SP Flash Tool, Driver and instruction manual. Step 3: Install the USB Drivers (skip if drivers are already installed). Step 4: Open the SP Flash Tool and load the Scatter File from the firmware folder. Step 5: Connect your Smartphone to the computer using the USB Driver. Step 6: Click on Upgrade / Download Button in the SP Flash Tool to Begin the Flashing. Step 7: Green Ring will appear at the end of successful Flash.
XIAOMI MI 3 WMI4WGLOBAL V7.0.5.0 FIRMWARE FLASH FILE
Xiaomi MI 3 WMI4WGlobal v7.0.5.0 Firmware Flash File
First step to flash Rom
Download Xiaomi File Tool
Download Xiaomi USB Driver
How To Install ROM Xiaomi MI 3
1 � Turn off the device. Press the Volume� key and the Power button at the same time to enter Fastboot mode. Then connect the device to the Windows PC/laptop via a micro USB cable
2 � Double click on the downloaded ROM file to decompress it. Open the file folder for the decompressed ROM pack, and copy its path on the computer.
3 � Decompress the MIUI ROM flashing tool downloaded, and double click on it to install (if there is security warning, select �Run�). After installation is completed, open MiFlash.exe and paste into the address bar the ROM file folder path copied in the last step.
4 � Click on the first button (circled out in yellow) to Refresh, and MiFlash should automatically recognize the device. Then click the second button (circled out in red) to flash the ROM file to the device.
Turn off the device. Press the Volume� key and the Power button at the same time to enter Fastboot mode. Then connect the device to the Windows PC/laptop via a micro USB cable
Double click on the downloaded ROM file to decompress it. Open the file folder for the decompressed ROM pack, and copy its path on the computer.
Decompress the MIUI ROM flashing tool downloaded, and double click on it to install (if there is security warning, select �Run�). After installation is completed, open MiFlash.exe and paste into the address bar the ROM file folder path copied in the last step.
Click on the first button (circled out in yellow) to Refresh, and MiFlash should automatically recognize the device. Then click the second button (circled out in red) to flash the ROM file to the device
After flashing process, starts, it might take up to 5-10 minutes. So, keep patience and wait
Like this post? Hit the share buttons below to share this article with your friends on Facebook, Google+ and Twitter.
First, you need to download and install SP flash tool
Download and install MTK android USB drivers
Then download Firmware file/Flash file/Rom for your phone
Your phone must have 50 % charging before this process
switch off your mobile remove the battery (if removable) reinsert the battery and plug the USB cable in charging socket
Now open SP flash tool.exe
When SP flash tool open, go to download button in SP flash tool
In download tab, click on scatter load button
After locating the scatter tab, click on the download button
Now connect your smart phone with a USB cable and press volume up or volume down key for easy detection (remove and re insert your phone battery if it is removable)
Now flashing is completed, a green ring will appear in SP flash tool
Close SP flash tool on your computer and unplug phone
Power on the phone and enjoy
After flashing process starts, it might take up to 5-10 minutes. So, keep patience and wait.
See detailed Instruction MT flashing SP tool with images
How To Flash Samsung Galaxy Core Duos GT I8262 Via Odin
How To Flash Samsung Galaxy Core Duos GT-I8262 Via Odin
How To Flash Samsung Galaxy Core Duos GT-I8262 Via Odin - After I discuss about How to Root Samsung Galaxy Core Duos, now I will discuss how to flash your Samsung Galaxy Core Duos via Odin. because still many users of android devices in particular is experiencing samsung Galcore Bootlop or hang due to user error or indeed the Android software already rusak.Dengan flash we can fix our broken system android or error as well as re-install on your PC or laptop.Nah process of replacing the software on this phone called flashing. and process before you start the flashing process should you backup first data- critical data residing on you. when Galcore Galcore you are already in a state of Bootlop or hang at the logo Immediately, we started to step flashing.
Materials :
Download Firmware Samsung Galaxy Core Duos
Download ODIN
Samsung USB Driver
Step Flashing:
Download Odin and USB driver samsung and install on your PC / Laptop you
Reboot Galcore you to download mode by Galcore power off, then press the volume down button, home button and power button simultaneously.
Press the volume up to continue into download mode.
Open ODIN which was downloaded
Make sure the auto reboot and F.reset time already checked And for the Re-partition should be checked if there is a file .pit her.
If the file was extracted Firmware consists of only one file .tar.md5, then click toggle PDA and browse to the location where the firmware file in the extract.
If the file there are three, then: Click the toggle PDA and select the file that says its CODE, Click the toggle Phone, and select the file that says his MODEM, Click the toggle CSC, and select the file that says his CSC.
Galcore Connect to a computer / laptop via a data cable and let it install the required drivers.
Wait until the box ID: COM to blue.
Click START toggle, and let the flashing process runs.
Do not unplug the USB cable during the process flasing
Galcore agan will reboot itself if the flashing process is completed.
And congratulations you successfully Flash Samsung Galaxy Core Duos you and have returned as buying a new one. To check for new firmware is complete diflashing, select Settings and then about the phone from you and see Galcore Firmwarenya.semoga version helpful and good luck.
Thus tutorial that we provide, do not forget to bookmark this website and wait for the latest update of Android Zone. see you later